
Could you imagine making your first trip to the dentist at age 39? Thats essentially what happened with this 1972 Telecaster. The owner purchased it brand new when he was 12 years old and it's been his main axe ever since. This is a really well built guitar, and it's certainly stood the test of time but it still needed complete re-fret and some finish and hardware restoration.

The one thing about maple fretboards on Fenders especially from this era, is that clear finish is sprayed on the fretboard after the frets have been installed. This means that the whole fret is covered with the same finish as the neck. On Rickenbacker guitars and basses this is considered part of the charm, but on a Fender in need of a re-fret, it's a challenge! Often the spray is excessively thick, and since maple is hard and smooth, the finish tends separate from the wood over time, making it very willing to peel and chip.
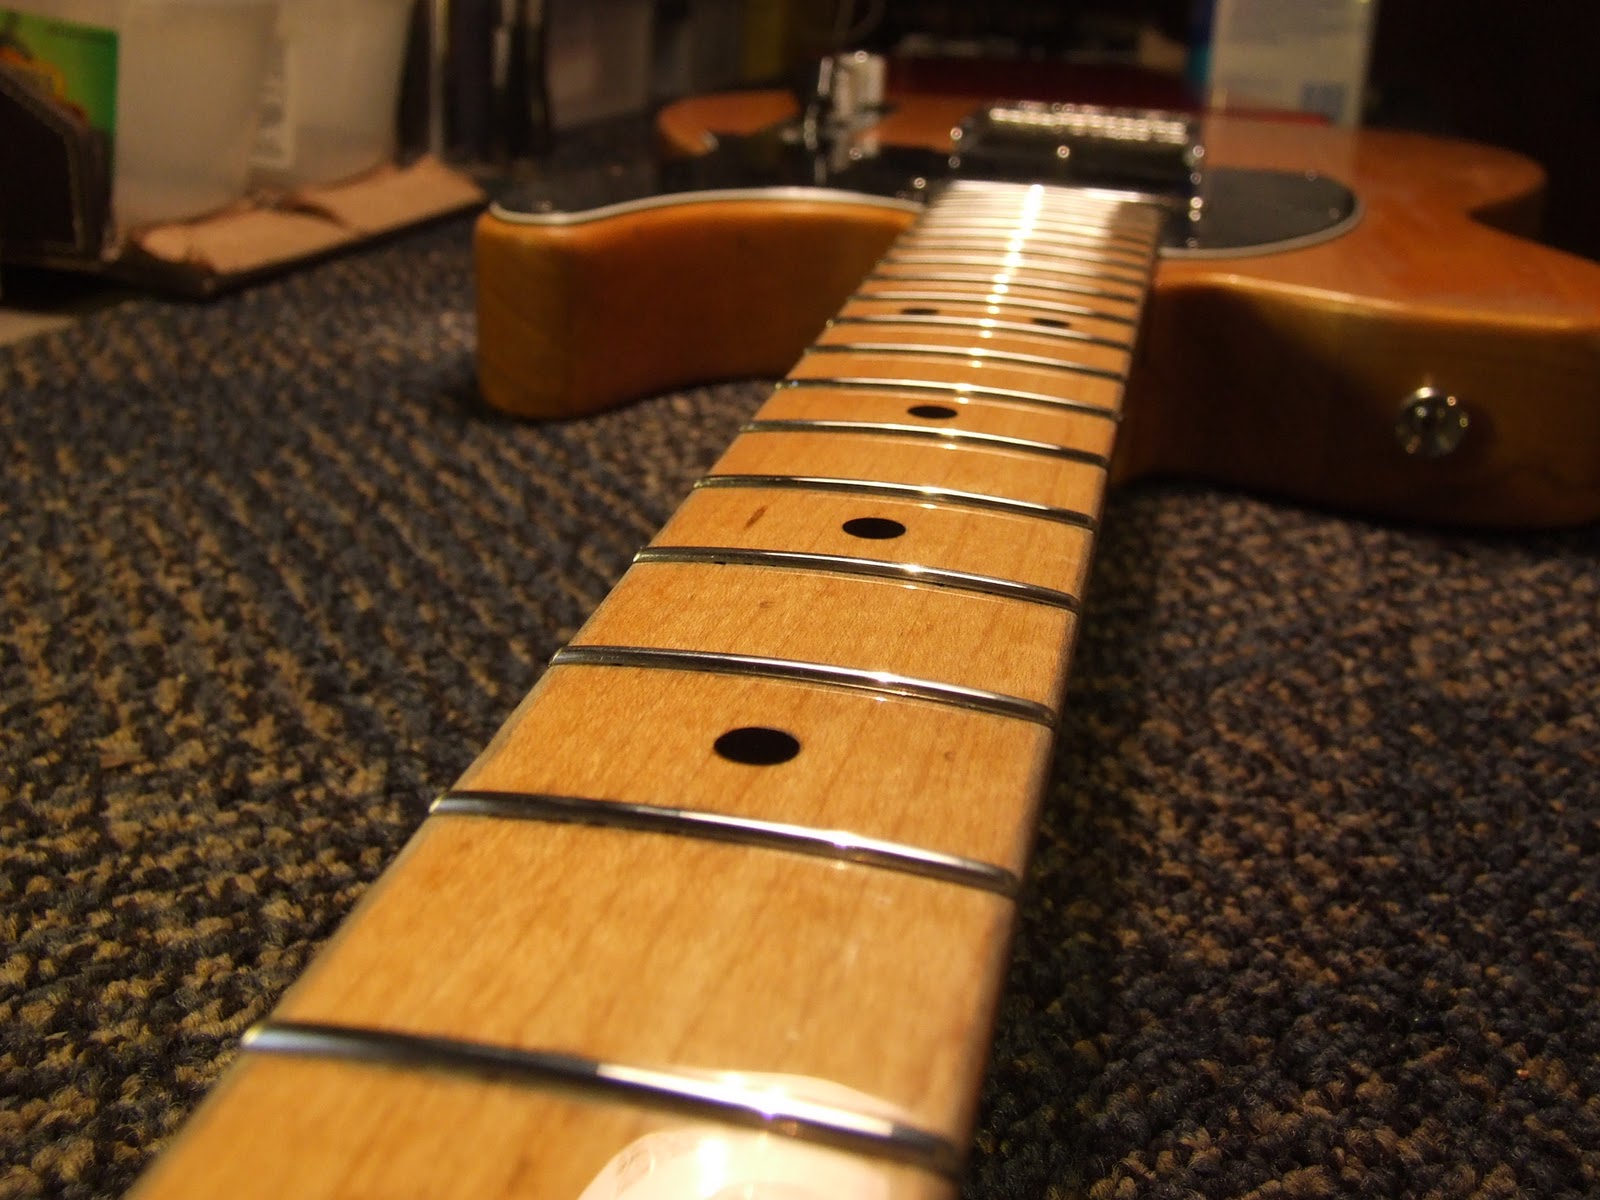
The spray on this neck is so thick that the frets have worn down to being basically flush with the finish. Because of that, removing the frets without damaging the finish is a serious challenge.

Towards the top of the fretboard, the finish was almost 1/8" thick. This is insane! While it was a struggle, all the frets came out with our standard fret pliers. All except for this last fret. It was so worn and buried so deep into the finish that we ended up having to heat the fret while using a fine tipped awl at the edge of the fingerboard under the wire. I was able to lift the fret just high enough to grab it with the pliers and remove as normal. Now that they're all removed, we'll move to repairing worn finish areas, and thinning out the finish on the fretboard.

First I filled all the chips and low spots with finish that will match the aged look. Once that dried, I started to sand it all out. The over sprayed finish led to little slopes inbetween all the frets. In order to ensure good contact on the re-fret, I'll make sure the finish is sanded level and that the frets will be able to be installed on a flat surface.

Normally we try to avoid making contact with maple fretboards at all, but this thick finish needed to be addressed. I started with 1000 grit paper, but soon realized that I needed to bump it up to a 600 if I wanted to finish in this lifetime. Once the high spots were level, I moved to 1000, then 1500 and then 2000 to remove all the sanding marks. Afterwards a little bit of naphtha was used to remove the dust and grime. The reality is that if the finish is 1/8" thick or 1/80" thick, it will shine like a star once its been buffed.

We've had quite a few 1970's and earlier Telecasters come through for re-frets recently, and they all have incredibly tight, small fret slots. They actually needed a bit of re-sizing before our modern Jescar wire was installed. You'd always rather smaller slots because you can always remove material, but you can never put it back!

While the frets are clamped up, I'll work on the restoration of the body and hardware. Like the frets, they have gone without any maintenance for a long long time.

And of course it shined up wonderfully. The transformation is one of the great joys of this job.

This guitar sounds exactly as a tele should. It is bright as hell, and could cut through any mix. Perfectly suited for country style subtle leads. Our goal was to make it look as bright as it sounds.

So, thats exactly what we did.

Around the edge of the pick guard and under the bridge plate, there was a very solid thick level of grunge built up. Normally naptha and elbow grease will remove this, but I had to also use some very fine steel wool to release the grime. Underneath was a nice warm aged natural finish.


I'm not sure it would even really feel like a true re-fret if i didn't sustain some injury during the job. Note to self - the fret ends are very sharp until you file them otherwise!

Because the owner has spent alot of time playing chords in root position, the fretboard is worn more here than anywhere else. After I lined up the frets and beveled them, I had to give special attention to the first two to make sure they matched the shape of the neck here.
And of course the great payoff when doing restoration work is the buffing stage. I get used to the dull look of a sanded fingerboard over the course of a week, and when it finally meets the buffing wheel its like an epiphany!

This is done with a combination of fine files, and is done to make sure there is nothing sharp left at all. After its been rounded, the frets are buffed out as normal, and since the 'half-moon' portion was sanded in a different direction, it retains a nice contrast in color / texture. Style points!

The nut had been recently replaced with a quality made bone nut, so instead of making a new one, we installed a .020" carbon fiber shim underneath. This actually can improve tone as well as bring the strings to the proper height.

The owner wanted the guitar to play like new again, while retaining the character that the guitar has accumulated over the years. To be honest, I wasn't sure if he would even recognize the guitar. He was literally speechless.

Based in Fayette County, The Tim Hall Band has been filling dance halls and honkey tonks for the past several years. If you get the chance to see them - don't miss it!
No comments:
Post a Comment